Difference between revisions of "Using Graphics"
m |
m |
||
| Line 7: | Line 7: | ||
<texcode>\externalfigure[logo.pdf]</texcode> | <texcode>\externalfigure[logo.pdf]</texcode> | ||
| − | This command places the PDF image <tt>logo.pdf</tt> in a | + | This command places the PDF image <tt>logo.pdf</tt> in a {{cmd|vbox}}; the width and height of the image are equal to the natural dimensions of the image. |
To set the width of the image to a specific size, say <tt>1cm</tt>, use: | To set the width of the image to a specific size, say <tt>1cm</tt>, use: | ||
| Line 64: | Line 64: | ||
</tr> | </tr> | ||
</table> | </table> | ||
| − | |||
The conversion generates a PDF file with prefix <tt>m_k_i_v_</tt> and a suffix <tt>.pdf</tt> added to the name of the original file. The result is cached, and the conversion is rerun if the timestamp of the original file is newer than that of the converted file. | The conversion generates a PDF file with prefix <tt>m_k_i_v_</tt> and a suffix <tt>.pdf</tt> added to the name of the original file. The result is cached, and the conversion is rerun if the timestamp of the original file is newer than that of the converted file. | ||
| Line 76: | Line 75: | ||
<texcode>\setupexternalfigures | <texcode>\setupexternalfigures | ||
[directory={images, /home/user/images}]</texcode> | [directory={images, /home/user/images}]</texcode> | ||
| − | Note | + | |
| + | Note: always use forward slashes in path names, regardless of operating system. | ||
The default search order is: the current directory, the parent directory, the grand-parent directory, and then the paths specified by the <tt>directory</tt> key. To restrict image search only to the paths specified by the <tt>directory</tt> key, use: | The default search order is: the current directory, the parent directory, the grand-parent directory, and then the paths specified by the <tt>directory</tt> key. To restrict image search only to the paths specified by the <tt>directory</tt> key, use: | ||
| Line 82: | Line 82: | ||
<texcode>\setupexternalfigures | <texcode>\setupexternalfigures | ||
[location=global]</texcode> | [location=global]</texcode> | ||
| + | |||
To restore the default search behavior, use: | To restore the default search behavior, use: | ||
<texcode>\setupexternalfigures | <texcode>\setupexternalfigures | ||
[location={local,global}]</texcode> | [location={local,global}]</texcode> | ||
| + | |||
The ConTeXt distribution includes three sample images: <tt>cow.pdf</tt>, <tt>mill.png</tt>, and <tt>hacker.jpg</tt>, that are useful when creating minimum working examples to illustrate a bug on the mailing list. These images are locating in the <tt>TEXMF</tt> directory. To add the <tt>TEXMF</tt> directory to the image search path, use: | The ConTeXt distribution includes three sample images: <tt>cow.pdf</tt>, <tt>mill.png</tt>, and <tt>hacker.jpg</tt>, that are useful when creating minimum working examples to illustrate a bug on the mailing list. These images are locating in the <tt>TEXMF</tt> directory. To add the <tt>TEXMF</tt> directory to the image search path, use: | ||
<texcode>\setupexternalfigures | <texcode>\setupexternalfigures | ||
[location={local,global,default}]</texcode> | [location={local,global,default}]</texcode> | ||
| + | |||
The above alternative adds the ''entire'' <tt>TEXMF</tt> directory to the search path, ''including the'' <tt>doc/</tt> ''directory!'' Therefore, one needs to be extremely careful when using this option. In fact, I would advise not using <tt>location=default</tt> except for illustrative minimal working examples. | The above alternative adds the ''entire'' <tt>TEXMF</tt> directory to the search path, ''including the'' <tt>doc/</tt> ''directory!'' Therefore, one needs to be extremely careful when using this option. In fact, I would advise not using <tt>location=default</tt> except for illustrative minimal working examples. | ||
| Line 103: | Line 106: | ||
<texcode>\enabledirectives[schemes.threshold=120]</texcode> | <texcode>\enabledirectives[schemes.threshold=120]</texcode> | ||
| + | |||
in the ConTeXt file, or compile the ConTeXt file using the command | in the ConTeXt file, or compile the ConTeXt file using the command | ||
| Line 133: | Line 137: | ||
</texcode> | </texcode> | ||
| − | Replace | + | Replace `http://proxy.example.com:3128` with the proxy URL. |
To disable the proxy again: | To disable the proxy again: | ||
| Line 140: | Line 144: | ||
\ctxlua{http = require("socket.http"); http.PROXY = nil} | \ctxlua{http = require("socket.http"); http.PROXY = nil} | ||
</texcode> | </texcode> | ||
| − | |||
= Image transformations = | = Image transformations = | ||
| Line 149: | Line 152: | ||
<texcode>\externalfigure[logo.pdf][scale=500]</texcode> | <texcode>\externalfigure[logo.pdf][scale=500]</texcode> | ||
| + | |||
Use <tt>\setupexternalfigures</tt> to set the scale of all images. For example, to scale all images to be twice their original size, use: | Use <tt>\setupexternalfigures</tt> to set the scale of all images. For example, to scale all images to be twice their original size, use: | ||
<texcode>\setupexternalfigures[scale=2000]</texcode> | <texcode>\setupexternalfigures[scale=2000]</texcode> | ||
| + | |||
If either <tt>width</tt> or <tt>height</tt> is specified, then the <tt>scale</tt> key has no effect. | If either <tt>width</tt> or <tt>height</tt> is specified, then the <tt>scale</tt> key has no effect. | ||
| Line 158: | Line 163: | ||
<texcode>\externalfigure[logo.pdf][xscale=500] | <texcode>\externalfigure[logo.pdf][xscale=500] | ||
\externalfigure[logo.pdf][yscale=500]</texcode> | \externalfigure[logo.pdf][yscale=500]</texcode> | ||
| − | |||
| − | + | == Restrict Image Dimensions == | |
| + | |||
| + | ConTeXt can limit included images to particular dimensions. For example, to ensure that an included image is not more than <tt>0.2\textwidth</tt>: | ||
<texcode>\externalfigure[logo.pdf][maxwidth=0.2\textwidth]</texcode> | <texcode>\externalfigure[logo.pdf][maxwidth=0.2\textwidth]</texcode> | ||
| + | |||
If <tt>maxwidth</tt> is specified and the width of the image is less than <tt>maxwidth</tt>, then the image is not scaled; if the width of the image is greater than <tt>maxwidth</tt>, then the width is restricted to <tt>maxwidth</tt> and the height is scaled appropriately to maintain the original aspect ratio. | If <tt>maxwidth</tt> is specified and the width of the image is less than <tt>maxwidth</tt>, then the image is not scaled; if the width of the image is greater than <tt>maxwidth</tt>, then the width is restricted to <tt>maxwidth</tt> and the height is scaled appropriately to maintain the original aspect ratio. | ||
| Line 172: | Line 179: | ||
[maxwidth=\textwidth, | [maxwidth=\textwidth, | ||
maxheight=0.8\textheight]</texcode> | maxheight=0.8\textheight]</texcode> | ||
| − | |||
| − | + | == Rotate images == | |
| + | |||
| + | Rotate included images by 90°, 180°, or 270° using the <tt>orientation</tt> key. For example: | ||
<texcode>\externalfigure[logo.pdf][orientation=90]</texcode> | <texcode>\externalfigure[logo.pdf][orientation=90]</texcode> | ||
| − | To rotate by an arbitrary angle, use the | + | |
| + | To rotate by an arbitrary angle, use the {{cmd|rotate}} command. For example: | ||
<texcode>\rotate[rotation=45]{\externalfigure[logo.pdf]}</texcode> | <texcode>\rotate[rotation=45]{\externalfigure[logo.pdf]}</texcode> | ||
| − | |||
| − | To mirror (flip) an image, use the generic | + | == Mirror Images == |
| + | |||
| + | To mirror (flip) an image, use the generic {{cmd|mirror}} command. For example, to mirror horizontally: | ||
<texcode>\mirror{\externalfigure[logo.pdf]}</texcode> | <texcode>\mirror{\externalfigure[logo.pdf]}</texcode> | ||
| + | |||
To mirror vertically, first rotate the image by 180° and then mirror it: | To mirror vertically, first rotate the image by 180° and then mirror it: | ||
<texcode>\mirror{\externalfigure[logo.pdf][orientation=180]}</texcode> | <texcode>\mirror{\externalfigure[logo.pdf][orientation=180]}</texcode> | ||
| + | |||
== Clipping images == | == Clipping images == | ||
| − | + | Clip an image using the generic {{cmd|clip}} command. For example, to clip the original image to a <tt>1cm x 2cm</tt> rectangle at an offset of <tt>(3mm,5mm)</tt> from the top left corner: | |
<texcode>\clip[width=1cm, height=2cm, hoffset=3mm, voffset=5mm] | <texcode>\clip[width=1cm, height=2cm, hoffset=3mm, voffset=5mm] | ||
{\externalfigure[logo.pdf]}</texcode> | {\externalfigure[logo.pdf]}</texcode> | ||
| + | |||
As another example, this cuts the image into a <tt>3x3</tt> pieces and then outputs the <tt>(2,2)</tt> piece: | As another example, this cuts the image into a <tt>3x3</tt> pieces and then outputs the <tt>(2,2)</tt> piece: | ||
<texcode>\clip[nx=3,ny=3,x=2,y=2] | <texcode>\clip[nx=3,ny=3,x=2,y=2] | ||
{\externalfigure[logo.pdf]}</texcode> | {\externalfigure[logo.pdf]}</texcode> | ||
| + | |||
= Troubleshooting = | = Troubleshooting = | ||
| − | == | + | This section describes various tips for discovering problems with embedded images. |
| + | |||
| + | == Visualize Bounding Box == | ||
If, for instance, the image is taking more space than expected, it can be useful to visualize the bounding box of the image. To do this: | If, for instance, the image is taking more space than expected, it can be useful to visualize the bounding box of the image. To do this: | ||
<texcode>\externalfigure[logo.pdf][frame=on]</texcode> | <texcode>\externalfigure[logo.pdf][frame=on]</texcode> | ||
| + | |||
ConTeXt includes a Perl script <tt>pdftrimwhite</tt> that removes extra white space at the borders of a PDF file. To run this script: | ConTeXt includes a Perl script <tt>pdftrimwhite</tt> that removes extra white space at the borders of a PDF file. To run this script: | ||
<pre>mtxrun --script pdftrimwhite <em>[flags] input output</em></pre> | <pre>mtxrun --script pdftrimwhite <em>[flags] input output</em></pre> | ||
| + | |||
The most important flag is <tt>--offset=dimen</tt>, which keeps some extra space around the trimmed image. | The most important flag is <tt>--offset=dimen</tt>, which keeps some extra space around the trimmed image. | ||
Similar functionality is provided by another Perl script, <tt>pdfcrop</tt>, that is included in most TeX distributions. | Similar functionality is provided by another Perl script, <tt>pdfcrop</tt>, that is included in most TeX distributions. | ||
| − | == Tracking | + | == Diagnostic Tracking == |
| − | To get diagnostic information about image inclusion, enable the tracker <tt>graphics.locating</tt> | + | To get diagnostic information about image inclusion, enable the tracker <tt>graphics.locating</tt> by editing the ConTeXt file and adding: |
<texcode>\enabletrackers[graphics.locating]</texcode> | <texcode>\enabletrackers[graphics.locating]</texcode> | ||
| − | + | ||
| + | Alternatively, compile the ConTeXt file using: | ||
<texcode>context --trackers=graphics.locating filename</texcode> | <texcode>context --trackers=graphics.locating filename</texcode> | ||
| + | |||
The tracker writes diagnostics to the console. Suppose we use <tt>\externalfigure[somefile.pdf]</tt> and ConTeXt finds the file in the current search path; then the following information is printed on the console: | The tracker writes diagnostics to the console. Suppose we use <tt>\externalfigure[somefile.pdf]</tt> and ConTeXt finds the file in the current search path; then the following information is printed on the console: | ||
| Line 244: | Line 264: | ||
<texcode>\useMPlibrary[dum]</texcode> | <texcode>\useMPlibrary[dum]</texcode> | ||
| + | |||
Then, whenever an image file is not found in the current search path, a random MetaPost image is shown in the output. | Then, whenever an image file is not found in the current search path, a random MetaPost image is shown in the output. | ||
<context> </context> | <context> </context> | ||
| − | == | + | == Leading Paragraph == |
| − | Using <tt> | + | Using {{cmd|externalfigure}}<tt>[...]</tt> at the beginning of a paragraph results in a line break after the image. This is because {{cmd|externalfigure}} is a {{cmd|vbox}} and when a {{cmd|vbox}} is encountered at (what appears to be) the beginning of a paragraph, it remains in vertical mode. To prevent this, add {{cmd|dontleavehmode}} before {{cmd|externalfigure}}, like this: |
<texcode>\dontleavehmode | <texcode>\dontleavehmode | ||
\externalfigure[...] ... first line ...</texcode> | \externalfigure[...] ... first line ...</texcode> | ||
| − | |||
| − | == Image | + | = Multiple Image Settings = |
| + | |||
| + | == Image Settings == | ||
| − | Suppose your document contains many side-by-side images, and you want all of these images to be of the same size. In addition, you want to control the size of all images by changing only one setup. To do this, you can use the | + | Suppose your document contains many side-by-side images, and you want all of these images to be of the same size. In addition, you want to control the size of all images by changing only one setup. To do this, you can use the {{cmd|defineexternalfigure}} macro, which defines a named collection of image settings. For example, to define a collection where the image width is <tt>3cm</tt>, use: |
<texcode>\defineexternalfigure[logo-settings] | <texcode>\defineexternalfigure[logo-settings] | ||
[width=3cm]</texcode> | [width=3cm]</texcode> | ||
| + | |||
And then to use these settings in an image, use: | And then to use these settings in an image, use: | ||
<texcode>\externalfigure[group.pdf][logo-settings]</texcode> | <texcode>\externalfigure[group.pdf][logo-settings]</texcode> | ||
| + | |||
or, if you want to add or override settings, use: | or, if you want to add or override settings, use: | ||
<texcode>\externalfigure[group.pdf][logo-settings] | <texcode>\externalfigure[group.pdf][logo-settings] | ||
[height=2cm]</texcode> | [height=2cm]</texcode> | ||
| − | |||
| − | Suppose your document contains an image at multiple locations; all of these images are to be of the same size, which is not necessarily the same as the natural size of the image. Furthermore, as before, you want to set the size of all the images by changing only one setup. Here, the macro to use is | + | == Image Labels == |
| + | |||
| + | Suppose your document contains an image at multiple locations; all of these images are to be of the same size, which is not necessarily the same as the natural size of the image. Furthermore, as before, you want to set the size of all the images by changing only one setup. Here, the macro to use is {{cmd|useexternalfigure}}, which defines a symbolic label for inserting an image plus settings. For example: | ||
<texcode>\useexternalfigure[mylogo] | <texcode>\useexternalfigure[mylogo] | ||
[logo.pdf][width=2cm]</texcode> | [logo.pdf][width=2cm]</texcode> | ||
| + | |||
defines an image label <tt>mylogo</tt> that maps to the image file <tt>logo.pdf</tt> and sets its width to <tt>2cm</tt>. This image label may be used as a normal image filename: | defines an image label <tt>mylogo</tt> that maps to the image file <tt>logo.pdf</tt> and sets its width to <tt>2cm</tt>. This image label may be used as a normal image filename: | ||
<texcode>\externalfigure[mylogo]</texcode> | <texcode>\externalfigure[mylogo]</texcode> | ||
| − | |||
| − | |||
| − | |||
= Place picture in the text = | = Place picture in the text = | ||
| Line 300: | Line 323: | ||
If you want to have the image to the right, you can do: | If you want to have the image to the right, you can do: | ||
| + | |||
<texcode> | <texcode> | ||
\setuppapersize[A5] | \setuppapersize[A5] | ||
| Line 310: | Line 334: | ||
There are more options (distance can even be negative): | There are more options (distance can even be negative): | ||
| + | |||
<texcode> | <texcode> | ||
\setuppapersize[A5] | \setuppapersize[A5] | ||
| Line 357: | Line 382: | ||
Movies aren't recognized automatically yet, you need a more verbose declaration: | Movies aren't recognized automatically yet, you need a more verbose declaration: | ||
| + | |||
<texcode> | <texcode> | ||
\externalfigure[demo.mov][label=demo,width=4cm,height=4cm,preview=yes] | \externalfigure[demo.mov][label=demo,width=4cm,height=4cm,preview=yes] | ||
</texcode> | </texcode> | ||
| + | |||
<tt>preview=yes</tt> shows the first image as preview. | <tt>preview=yes</tt> shows the first image as preview. | ||
You find more about interactive Elements in [http://www.pragma-ade.com/general/manuals/mwidget-s.pdf mwidget-s.pdf] | You find more about interactive Elements in [http://www.pragma-ade.com/general/manuals/mwidget-s.pdf mwidget-s.pdf] | ||
Unfortunately, people who are fond of Linux cannot embed movies because the linux release of acroread doesn't support that. An alternative solution consists in launching your prefered player (MPlayer) from acroread: | Unfortunately, people who are fond of Linux cannot embed movies because the linux release of acroread doesn't support that. An alternative solution consists in launching your prefered player (MPlayer) from acroread: | ||
| + | |||
<texcode> | <texcode> | ||
\defineprogram[dummy.mpeg][dummy.mpeg.sh] | \defineprogram[dummy.mpeg][dummy.mpeg.sh] | ||
| Line 378: | Line 406: | ||
== Full page images == | == Full page images == | ||
| + | |||
* See [[Simple Cover Page]] | * See [[Simple Cover Page]] | ||
| Line 392: | Line 421: | ||
</texcode> | </texcode> | ||
| + | == See also == | ||
| − | |||
* [[Animation]] | * [[Animation]] | ||
* [[Example photo page layout]] | * [[Example photo page layout]] | ||
Revision as of 19:52, 30 March 2014
< Graphics | Combinations | Supported Media File Formats | Including pages from PDF documents | Animation >
Contents
Basic usage
The simplest way to insert an image is to use:
\externalfigure[logo.pdf]
This command places the PDF image logo.pdf in a \vbox; the width and height of the image are equal to the natural dimensions of the image.
To set the width of the image to a specific size, say 1cm, use:
\externalfigure[logo.pdf][width=1cm]
Similarly, to set the height of the image to a specific size, say 2cm, use:
\externalfigure[logo.pdf][height=2cm]
If only the width or height of the image is specified, the other dimension is scaled appropriately to keep the aspect ratio.
To include a specific page, say page 5, of a multi-page PDF file, use:
\externalfigure[logo.pdf][page=5]
These four variations cover 90% of the use cases.
Natively supported file formats
ConTeXt natively supports the image formats enumerated below. The image format is determined from the file extension (case insensitive).
- PDF: File extension .pdf
- MPS (MetaPost output): File extension .mps or .<digits>
- JPEG: File extension .jpg or .jpeg
- PNG: File extension .png
- JPEG 2000: File extension .jp2
- JBIG or JBIG2: File extension .jbig, .jbig2, or .jb2
Including images after conversion
The image formats listed in the previous section are the ones that may be embedded directly in a PDF. ConTeXt also supports a few other formats which are first converted to PDF using an external program. Of course, for such a conversion to work, the corresponding converter must be in the PATH.
| Format | Extension | Converter |
| SVG | .svg, .svgz |
inkscape |
| EPS | .eps, .ai |
gs (or gswin32c on Windows) from Ghostscript |
| GIF | .git |
gm from GraphicsMagick |
| TIFF | .tiff |
gm from GraphicsMagick |
The conversion generates a PDF file with prefix m_k_i_v_ and a suffix .pdf added to the name of the original file. The result is cached, and the conversion is rerun if the timestamp of the original file is newer than that of the converted file.
Specifying image directories
By default, ConTeXt searches an image in the current directory, the parent directory, and the grand-parent directory.
To search for images in other directories, say a ./images subdirectory and /home/user/images, use:
\setupexternalfigures
    [directory={images, /home/user/images}]
Note: always use forward slashes in path names, regardless of operating system.
The default search order is: the current directory, the parent directory, the grand-parent directory, and then the paths specified by the directory key. To restrict image search only to the paths specified by the directory key, use:
\setupexternalfigures
    [location=global]
To restore the default search behavior, use:
\setupexternalfigures
    [location={local,global}]
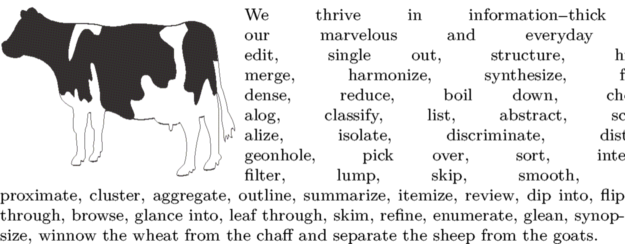
The ConTeXt distribution includes three sample images: cow.pdf, mill.png, and hacker.jpg, that are useful when creating minimum working examples to illustrate a bug on the mailing list. These images are locating in the TEXMF directory. To add the TEXMF directory to the image search path, use:
\setupexternalfigures
    [location={local,global,default}]
The above alternative adds the entire TEXMF directory to the search path, including the doc/ directory! Therefore, one needs to be extremely careful when using this option. In fact, I would advise not using location=default except for illustrative minimal working examples.
Remote Images
The \externalfigure command supports reading files from web servers, for example:
\externalfigure
   [http://tug.org/images/logobw.jpg]
When a document containing a remote file is compiled for the first time, the remote file is downloaded from the server and stored in the LuaTeX cache directory. This cached file is used during subsequent runs.
Normally, the remote image is downloaded again if the image in the cache is older than 1~day. To change this threshold to, for example, 2minutes (120seconds), either add
\enabledirectives[schemes.threshold=120]
in the ConTeXt file, or compile the ConTeXt file using the command
context --directives=schemes.threshold=120 <em>filename</em>
The variable schemes.threshold is global, so changing its value affects all other macros like \input, \usemodule, \component, etc. that load remote files.
HTTPS
For self-signed certificates retrieved over HTTPS, the curl command requires a flag to retrieve insecure files, which is not enabled by default. Open tex/texmf-context/tex/context/base/data-sch.lua to find:
local function runcurl(name,cachename) -- we use sockets instead or the curl library when possible
    local command = "curl --silent --create-dirs --output " .. cachename .. " " .. name
    os.spawn(command)
end
Insert the -k or --insecure option:
local command = "curl --insecure --silent --create-dirs --output " .. cachename .. " " .. name
HTTP Proxy
To use an http proxy for fetching images, the http variable (LuaSocket) has to be set up as follows:
\ctxlua{http = require("socket.http"); http.PROXY = "http://proxy.example.com:3128"}
Replace http://proxy.example.com:3128 with the proxy URL.
To disable the proxy again:
\ctxlua{http = require("socket.http"); http.PROXY = nil}
Image transformations
Scaling images
To scale an image use the scale key: scale=1000 corresponds to the original dimensions of the image, scale=500 scales the image to 50% of the original size, scale=1500 scales the images to 150% of the original size, and so on. For example:
\externalfigure[logo.pdf][scale=500]
Use \setupexternalfigures to set the scale of all images. For example, to scale all images to be twice their original size, use:
\setupexternalfigures[scale=2000]
If either width or height is specified, then the scale key has no effect.
In addition, the xscale and yscale keys scale the image in only one dimension. For example:
\externalfigure[logo.pdf][xscale=500]
\externalfigure[logo.pdf][yscale=500]
Restrict Image Dimensions
ConTeXt can limit included images to particular dimensions. For example, to ensure that an included image is not more than 0.2\textwidth:
\externalfigure[logo.pdf][maxwidth=0.2\textwidth]
If maxwidth is specified and the width of the image is less than maxwidth, then the image is not scaled; if the width of the image is greater than maxwidth, then the width is restricted to maxwidth and the height is scaled appropriately to maintain the original aspect ratio.
The option maxheight is analogous to maxwidth, for checking the height of the image.
For example, to ensure that figures do not overflow the text~area, one may set:
\setupexternalfigures
    [maxwidth=\textwidth,
     maxheight=0.8\textheight]
Rotate images
Rotate included images by 90°, 180°, or 270° using the orientation key. For example:
\externalfigure[logo.pdf][orientation=90]
To rotate by an arbitrary angle, use the \rotate command. For example:
\rotate[rotation=45]{\externalfigure[logo.pdf]}
Mirror Images
To mirror (flip) an image, use the generic \mirror command. For example, to mirror horizontally:
\mirror{\externalfigure[logo.pdf]}
To mirror vertically, first rotate the image by 180° and then mirror it:
\mirror{\externalfigure[logo.pdf][orientation=180]}
Clipping images
Clip an image using the generic \clip command. For example, to clip the original image to a 1cm x 2cm rectangle at an offset of (3mm,5mm) from the top left corner:
\clip[width=1cm, height=2cm, hoffset=3mm, voffset=5mm]
     {\externalfigure[logo.pdf]}
As another example, this cuts the image into a 3x3 pieces and then outputs the (2,2) piece:
\clip[nx=3,ny=3,x=2,y=2]
     {\externalfigure[logo.pdf]}
Troubleshooting
This section describes various tips for discovering problems with embedded images.
Visualize Bounding Box
If, for instance, the image is taking more space than expected, it can be useful to visualize the bounding box of the image. To do this:
\externalfigure[logo.pdf][frame=on]
ConTeXt includes a Perl script pdftrimwhite that removes extra white space at the borders of a PDF file. To run this script:
mtxrun --script pdftrimwhite <em>[flags] input output</em>
The most important flag is --offset=dimen, which keeps some extra space around the trimmed image.
Similar functionality is provided by another Perl script, pdfcrop, that is included in most TeX distributions.
Diagnostic Tracking
To get diagnostic information about image inclusion, enable the tracker graphics.locating by editing the ConTeXt file and adding:
\enabletrackers[graphics.locating]
Alternatively, compile the ConTeXt file using:
context --trackers=graphics.locating filename
The tracker writes diagnostics to the console. Suppose we use \externalfigure[somefile.pdf] and ConTeXt finds the file in the current search path; then the following information is printed on the console:
graphics > inclusion > locations: local,global
graphics > inclusion > path list: . .. ../..
graphics > inclusion > strategy: forced format pdf
graphics > inclusion > found: somefile.pdf -> somefile.pdf
graphics > inclusion > format natively supported by backend: pdf
If the file somefile.pdf is not found in the current search path, then the following information is printed on the console (even if the graphics.locating tracker is not set):
graphics > inclusion > strategy: forced format pdf
graphics > inclusion > not found: somefile.pdf
graphics > inclusion > not found: ./somefile.pdf
graphics > inclusion > not found: ../somefile.pdf
graphics > inclusion > not found: ../../somefile.pdf
graphics > inclusion > not found: images/somefile.pdf
graphics > inclusion > not found: /home/user/images/somefile.pdf
graphics > inclusion > format not supported:
and a placeholder gray box is put in the output:

Sometimes, one would rather use a placeholder image for an image that is yet to be made. In such cases, load the MP library dum via:
\useMPlibrary[dum]
Then, whenever an image file is not found in the current search path, a random MetaPost image is shown in the output.
Leading Paragraph
Using \externalfigure[...] at the beginning of a paragraph results in a line break after the image. This is because \externalfigure is a \vbox and when a \vbox is encountered at (what appears to be) the beginning of a paragraph, it remains in vertical mode. To prevent this, add \dontleavehmode before \externalfigure, like this:
\dontleavehmode
\externalfigure[...] ... first line ...
Multiple Image Settings
Image Settings
Suppose your document contains many side-by-side images, and you want all of these images to be of the same size. In addition, you want to control the size of all images by changing only one setup. To do this, you can use the \defineexternalfigure macro, which defines a named collection of image settings. For example, to define a collection where the image width is 3cm, use:
\defineexternalfigure[logo-settings]
                     [width=3cm]
And then to use these settings in an image, use:
\externalfigure[group.pdf][logo-settings]
or, if you want to add or override settings, use:
\externalfigure[group.pdf][logo-settings]
               [height=2cm]
Image Labels
Suppose your document contains an image at multiple locations; all of these images are to be of the same size, which is not necessarily the same as the natural size of the image. Furthermore, as before, you want to set the size of all the images by changing only one setup. Here, the macro to use is \useexternalfigure, which defines a symbolic label for inserting an image plus settings. For example:
\useexternalfigure[mylogo]
                  [logo.pdf][width=2cm]
defines an image label mylogo that maps to the image file logo.pdf and sets its width to 2cm. This image label may be used as a normal image filename:
\externalfigure[mylogo]
Place picture in the text
You can directly place a figure in a text using \externalfigure[cow]. If you want to align it not to the baseline, but lower you can try whether \bbox{\externalfigure[cow]} does the right thing, otherwise you have to tweek \smash{\lower24pt\hbox{\externalfigure[cow]}}
Flow text around a picture
\setuppapersize[A5]
\setupexternalfigures[location={local,default}]
\starthanging{\externalfigure[cow][width=4cm]}
\input tufte
\stophanging
\starthanging is influenced by \setuphanging, but doesn’t take parameters itself. It’s currently broken in MkII (here in the garden), but works with MkIV.
If you want to have the image to the right, you can do:
\setuppapersize[A5]
\setupexternalfigures[location={local,default}]
\setuphanging[location=right]
\starthanging{\externalfigure[cow][width=4cm]}
    \input tufte
\stophanging
There are more options (distance can even be negative):
\setuppapersize[A5]
\setupexternalfigures[location={local,default}]
\setuphanging[location=right,n=2,distance=1cm]
\starthanging{\externalfigure[cow][width=4cm]}
    \input tufte
\stophanging
Parameter n defines how many lines should flow around, useful for pictures with whitespace below.
This replaces undocumented \starthangaround (that you still might find in the source, if the garden isn’t updated yet).
You might also want to look into Combinations.
Pictures as Floating Objects
Floats are numbered and placed by ConTeXt, and they can get a caption.
\placefigure[place]{My Caption}{\externalfigure[myone]}
place is one of: left, right, here, top, bottom, inleft, inright, inmargin, margin, page, opposite, always, force, tall
You get no caption with none.
You get a table of figures with \showexternalfigures[alternative=a]. Alternatives (styles) a, b and c are predefined.
The second brackets of \placefigure can contain any command, e.g. \getbuffer.
You find more about floats (Floating Objects) in the manual.
Floating graphics with an enlarged, shaded background
To place a figure in, say, the right margin with a shaded background that is slightly larger than the figure (to give a bit of breathing room):
\setupcolors[state=start]
\placefigure[right,high,none]{}{\framed[frame=on, offset=10pt, framecolor=lightgray,
    background=color, backgroundcolor=lightgray]%
  {\externalfigure[sample/cow.pdf][scale=500]}}
\input knuth
Movies
Movies aren't recognized automatically yet, you need a more verbose declaration:
\externalfigure[demo.mov][label=demo,width=4cm,height=4cm,preview=yes]
preview=yes shows the first image as preview. You find more about interactive Elements in mwidget-s.pdf
Unfortunately, people who are fond of Linux cannot embed movies because the linux release of acroread doesn't support that. An alternative solution consists in launching your prefered player (MPlayer) from acroread:
\defineprogram[dummy.mpeg][dummy.mpeg.sh]

\starttext
\goto{\externalfigure[dummy-preview][width=0.48\textwidth]}[program(dummy.mpeg{})]
\stoptext
The script dummy.mpeg.sh should contain:
FILE=$(basename "$0"); mplayer -fs -zoom ${FILE/.sh/}
Full page images
Picture with hyperlink
This is an example of how to make a picture interactive. When the user clicks it, it invokes the user's browser to a given URL.
\setupinteraction[state=start]

\starttext
This is a cow: \goto{\externalfigure[cow][height=2ex]}[url(http://en.wikipedia.org/wiki/Cow)]
\stoptext