Difference between revisions of "Command/bleed"
< Command
Jump to navigation
Jump to search
(Created page with "Documentation for \bleed") |
(No difference)
|
Revision as of 17:52, 8 May 2024
Contents
\bleed
Summary
The command \bleed is used to modify the actual dimension of the place allocated to a figure.
Settings
Description
Examples
Example 1
%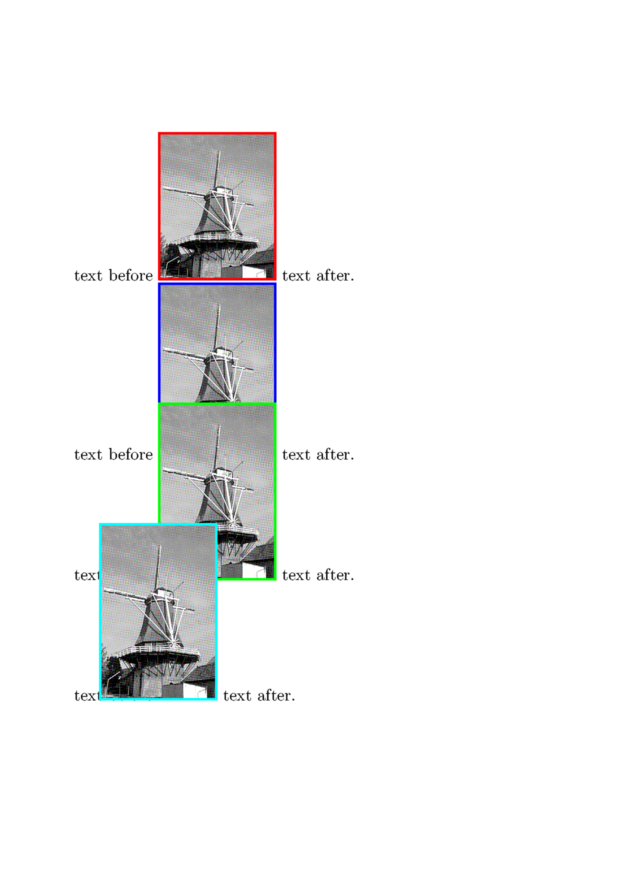
\setuppapersize[A6]
\setupheadertexts[]
\starttext

text before
\externalfigure[mill][width=2cm,frame=on,rulethickness=1pt,framecolor=red]
text after.

text before
\bleed                 [width=2cm,height=3cm,location=l]{%
\externalfigure [mill] [width=2cm,height=3cm,frame=on,rulethickness=1pt,framecolor=blue]}
text after.

text before
\bleed                 [width=2cm,height=2cm,location=l]{%
\externalfigure [mill] [width=2cm,height=3cm,frame=on,rulethickness=1pt,framecolor=green]}
text after.

text before
\bleed                 [width=1cm,height=2cm,location=l]{%
\externalfigure [mill] [width=2cm,height=3cm,frame=on,rulethickness=1pt,framecolor=cyan]}
text after.

%\bleed [width=5cm,height=1cm,location=l]
%  {\externalfigure[mill][width=\bleedwidth,height=\bleedheight]}

\stoptext

%